
LED Tutorials
When working with LED Lighting products for the first time or even if you are an experienced user certain aspects of LED Lighting can be a bit confusing. If you do not have all of the correct components or you do not properly calculate your LED supplies then you risk damaging your product, fire hazard, or simply your product not working at all. Follow these simple LED Lighting Tutorials in order to be certain that you are using and installing all of you LED products appropriately.
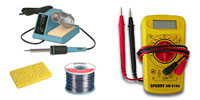
Using the proper tools is essential when using LED Products, visit this tutorial for an overview on what tools you will need to set up your LED Project as well as troubleshooting techniques to help you solve any improper installation techniques.
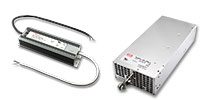
When purchasing LED Lighting products it is a common question of what size power supply is needed to run a given amount of LED components. Visit this tutorial to learn more about how to properly calculate the correct size power supply for your project.
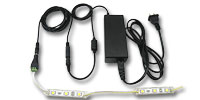
Click here to learn how to make your single color LED Lights function properly without damaging the product by improper installation. Also find reference to the different colored DC wires on the market and what polarity they typically stand for.
Confused about what products you need for your project or what components will work best with one another? Click here for a complete tutorial from start to finish on what components and products will work best for your project.
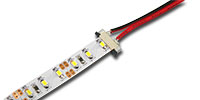
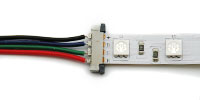
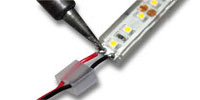
LED Strip Light quick connectors are the only alternative to soldering and work quite well when used correctly and are left untouched in a secure area. Click here to learn more about these quick and easy connectors, although we always recommend soldering for the best possible connection.
LED Strip Light quick connectors are the only alternative to soldering and work quite well when used correctly and are left untouched in a secure area. Click here to learn more about these quick and easy connectors, although we always recommend soldering for the best possible connection.
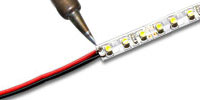
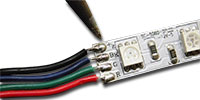
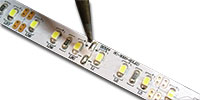
Soldering is a quick and easy way to get the best possible connection when cutting and re-using LED Strip Lights. Although soldering is fairly straight forward there are still many factors to avoid any damages that can occur from a faulty connection. Click here for a quick and easy tutorial on how to properly solder stranded wire to LED Strip Lights.
Soldering is a quick and easy way to get the best possible connection when cutting and re-using LED Strip Lights. Although soldering is fairly straight forward there are still many factors to avoid any damages that can occur from a faulty connection. Click here for a quick and easy tutorial on how to properly solder stranded wire to LED Strip Lights.
9.) How to solder wire to Waterproof LED Strip Lights & Re-Waterproof Connections
Skill Level: Advanced
Skill Level: Advanced
Soldering wire to a non-coated strip light is pretty basic, but when you add a TPU, PU, or epoxy waterproof coating things get a little more technical. Follow this tutorial to see the proper steps in soldering wire to your waterproof strip light as well as a few waterproofing techniques for your new connection.
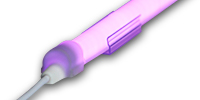
RGB Neon Strip Lights provide dot free lighting without the need of a cover or diffuser. This tutorial will show you the proper way to cut, connect, and reseal RGB Neon waterproof strip lights to retain an IP66 water and dust tight rating.
Soldering ribbon to ribbon is a bit more complicated than soldering wire to ribbon but is still the best way to ensure a solid connection. There are a few more factors to avoid when overlap soldering ribbon to ribbon. Click here for a quick and easy tutorial on how to properly overlap solder two LED Strip Lights to one another.
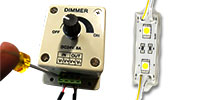
PWM stands for Pulse Width Modulation and is one of the most common methods of dimming LED Lighting products. Although the installation is rather straight forward, there are a few things to consider and be aware of before installation to avoid any damage to your LED Product through improper installation.
We have two types of signal amplifiers that can be used with low voltage PWM dimmable single color LED lights. The first is a single channel signal amplifer that is a bit more expensive but much less of a wiring headache than using an RGB Signal Amplifier. Visit this tutorial to see how both work with your PWM LED Dimmer.

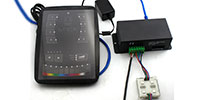
Hooking up an RGB Controller to a small set or run of RGB LED Lights is a fairly simple process, but when you are pushing the power limits on your RGB Controller and want to add additional lights to your controller a Signal Amplifier is necessary. View this tutorial to see how to properly install an RGB Controller and incorporate a Signal Amplifier when necessary.
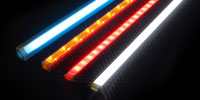
We carry a large variety of LED Strip Lights as well as Aluminum Extrusions designed to mount your LED strips. The extrusions not only provide a pleasing esthetic but also provide a heat sink for the LED strip, which extends the lifetime and brightness of the LEDs. Follow this tutorial to see how you can make your own custom lighting fixtures.
16.) How to determine proper diffusion for your LED Light Box and Channel Letters
Skill Level: Intermediate
Skill Level: Intermediate
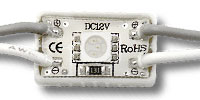
When using LED Strip Lights or LED Modules for your light boxes and channel letters it is important to know the right techniques to be sure that your LEDs can not be seen through the acrylic or plastic cover. Visit this tutorial to learn proper spacing techniques to be sure that your light box and channel letters glow as one even light.

17.) How to create a color chasing effect using single color LED Modules and an RGB LED Controller
Click Here to View YouTube Video
Skill Level: Advanced
Click Here to View YouTube Video
Skill Level: Advanced
Many people don't realize the different types of color changing effects you can achieve by thinking outside of the box and using LED components a little differently than how they are intended to be used. in this tutorial we will explain how to achieve a chasing effect using single color LED Modules and an RGB Controller.
Although DMX Control was originally created for stage shows it can also be used in a variety of other applications where an LED user wants complete control over there LED Lighting. In this tutorial you will learn all the components you will need as well as proper installation techniques to start making your LED Lights do exactly what you want them to do through computer software.
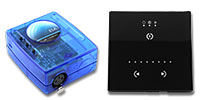
Our U9 DMX Controller can be used to program custom lightign scenes for up to 256 DMX channels. Program the scenes using free computer software and then save your lighting scenes to the U9 controller. Play the scenes in Stand Alone Mode or away from the computer for amazing and precise lighting effects.
20.) How to install and use ESA Software for our 128 & 256 Channel DMX Lighting Controllers
Skill Level: Advanced
Skill Level: Advanced
Compatible Controller SKUS: LC-NL-STICK2 , LC-NL-DMX-U9
Our Stick2 128 Channel DMX Controller can control up to 42 RGB Light Fixtures or 128 Single Color Light Fixtures. The U9 256 Channel DMX Controller can control 83 RGB Fixtures or 256 Single Color Light Fixtures. Follow this tutorial to see directions on installing and operating the ESA computer software that can be used with both controllers listed above.
Our Stick2 128 Channel DMX Controller can control up to 42 RGB Light Fixtures or 128 Single Color Light Fixtures. The U9 256 Channel DMX Controller can control 83 RGB Fixtures or 256 Single Color Light Fixtures. Follow this tutorial to see directions on installing and operating the ESA computer software that can be used with both controllers listed above.
21.) How to install and use ESA PRO Software for our STICK DMX Lighting Controller
Skill Level: Advanced
Skill Level: Advanced
Compatible Controller SKUS: LC-NL-STICK
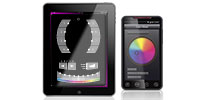
Our STICK DMX Controller uses the ESA Pro computer software to control up to 1024 DMX channels and the ability to control over an Ethernet connection. Follow this tutorial for step by step instructions on installing and using the ESA Pro software for our STICK Controller.
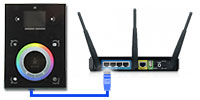
Compatible Controller SKU: LC-NL-STICK3
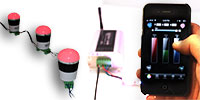
One of the greatest features of the STICK3 controller is the ability to control your LED lights over a wireless network using applications on your smart phone or tablet, or by using a network connection to make changes to your lighting scenes from a network PC with ESA Pro Software. Follow this tutorial to see how to use the Ethernet connection on your STICK3 DMX Controller.
One of the greatest features of the STICK3 controller is the ability to control your LED lights over a wireless network using applications on your smart phone or tablet, or by using a network connection to make changes to your lighting scenes from a network PC with ESA Pro Software. Follow this tutorial to see how to use the Ethernet connection on your STICK3 DMX Controller.
hello friendsmy name is rajkumar. and if you need help about this post you can send we massage by contect us page.
ConversionConversion EmoticonEmoticon